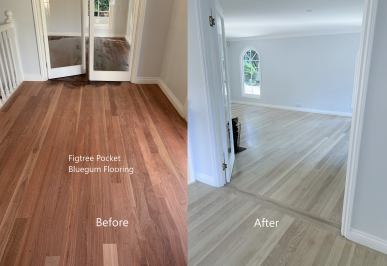
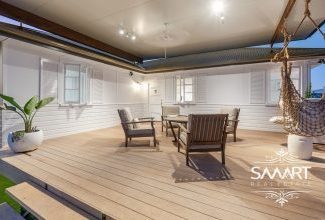
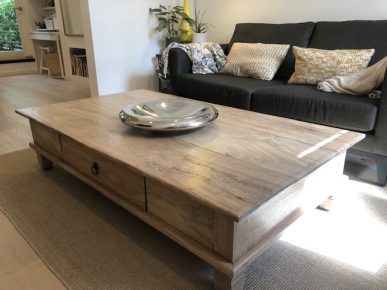
Wood Treatment Coverage 10m2/litre (per part) eg 2lt kit will treat 10m2
Clean up:- Water
Kit Sizes Available:-100ml,2L,5L,10L,20L
Remove all traces of previous coatings, stains ect by sanding to 120 grit
Part (A) is the activator. Its job is to pull the tannin and natural colour from the wood to the surface. So expect the wood to go darker in colour when Part(A) is applied.
Application:
Use a brush for small areas like furniture, benchtops or stairs as if you putting on a coat of varnish.
For larger areas such as floors, decks
Cut in with a brush and use a string mop and bucket to apply as if you were washing the floor.
Don’t miss any spots and wipe off any areas that have pooled with product.
You just need to achieve a wet look. You will notice rather quickly as the tannin is drawn out, (see fig. A)
The colour change can be quite dramatic depending on the species of wood.
Allow the’ surface to dry before applying Part (B).
Apply Part (B) Cut in around the edges with a cheap 90mm synthetic brush and be sure to apply plenty of product.
A medium house broom is ideal for applying the Part B as it works just like a big brush. Again, apply plenty of product and work it in with
the edges so not to miss anywhere. Try to keep to a spread rate of 10-12m2 per litre
Be careful with Part (B), as it is a strong grade H2O2 which is a oxidizing agent and will burn your skin. So protect yourself with
chemical gloves and eye protection. Application of Part (B) starts to bleach the extracted tannin and wood fibres, almost immediately.
You may notice some fizzing & foaming from the reaction and the colour changing rather quickly. This is normal. (see fig. B)
Now we wait until the wood is dry. Atmospheric conditions need to be factored in to the equation. Though usually overnight is required.
Once the wood is dry, that’s the level of bleaching achieved from that application. Some species of wood may require a repeat
of the process, if they are really dense like Grey Gum or notably high in tannin colour like Merbau. Your next and very impo r t a n t s tep in the
process, is cleaning the wood surface to remove all residues from the bleaching process. No coatings or finishes at all will stick or cure
on the surface without cleaning. Use fresh water and a small amount of detergent. For floors, use the string mop and bucket and do the
edges by hand with a cloth to get in close to skirting and corners.
For Decks, use a stiff broom and the water hose. Smaller applications may be done with absorbent cloths. Once the wood is dry from
cleaning, this is the level of bleaching achieved.
Once the job is clean and you notice some missed spots, just apply some more Part(B) with a brush. Leave for 60-90 mins, then clean
off and allow to dry. The bleached wood may be finished with any wood washes, stains, waxes, oils and water based clear coatings you prefer.
It is not advised to use solvent based coatings as they will turn yellow immediately.
DO NOT USE OUTDOORS IF RAIN IS EXPECTED WITHIN 4 HOURS.
LiteniT can be used on any species of wood you wood like to bleach. Some very hard, dense woods and exotics may require more than one application depending on the level of bleaching desired.
YOU CAN BLEACH
Wooden Furniture
Timber Flooring/Decking (On/Off Site)
Cabinets, Veneers
Wooden Art/Sculptures